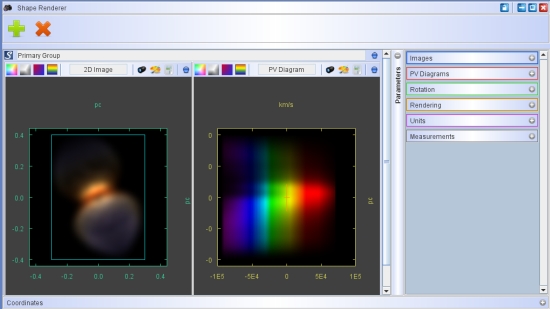
The image options and file operations can be accessed via the icons at the top-right of the image displays in the Main Interface.
To load an image as an observation to be compared with the model, click on the small zoom-lens icon. A file opening dialog opens. Select your image file. To see the image right-click on the mouse and drag from right to left to change the transparency of the foreground image and make a smooth transition between the two images. At intermediate transparency the images are mixed and can be compared. Sometimes going quickly back and forth between the two images allows to more easily detect differences in size or position.
If you right-click on the zoom-lens icon its colors are inverted.

Now the model and observational images are subtracted from each other. This allow17-May-2010 difference image you still have to right-click and drag on the image from right to left. To get back to the normal mode, once more right-click on the zoom-lens.
To set image adjustment properties open the corresponding dialog by clicking on the color palette.
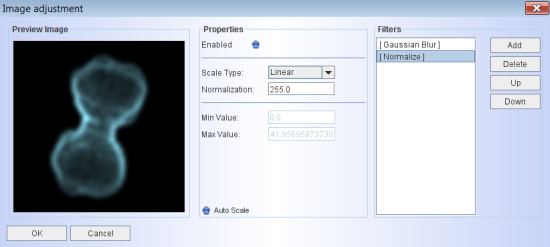
On the left of the image adjustment dialog you find a preview image, in which the currently selected adjustments are applied to the model image. To accept any parameter changes click on the "OK" button. If you would like to keep the original settings, click on "Cancel".
On the right side of the adjustment dialog you find a list of image filters that are applied to the image. With the buttons to the right of the list you can add. delete or move up and down items in the list. Filters are applied in top to bottom order. Note that in some cases the result may depend on the order of the filters. The properties of the currently selected filter are shown and can be changed in the middle section.
The following image filters are currently available:
- Invert: inverts the color table
- Color: change brightness, contrast and gamma value
- Gaussian blur: apply a convolution with a gaussian point-spread function. This is need for the seeing and velocity resolution parameters to function (they override the values in the filter properties settings).
- Contour: add contours to the image
- Scale: you can select from a number of different greyscales, including linear, log, square root, etc.
- Normalize: this filter normalizes the image to a certain value (default 255). It does also include the functionality of the scale filter.
- Grey: turns a color image into a greyscale image
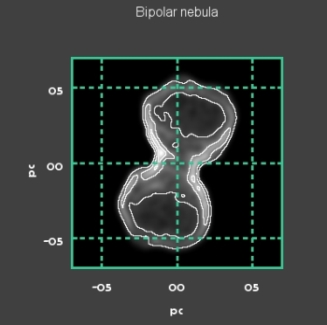
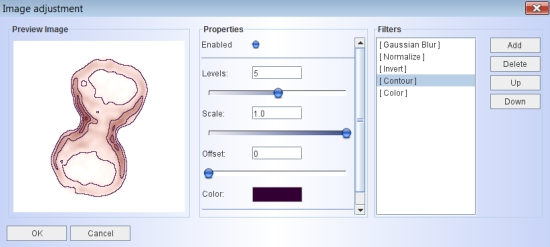 |
A sequence of image filters have been applied to the change the appearance of the image shown above. |
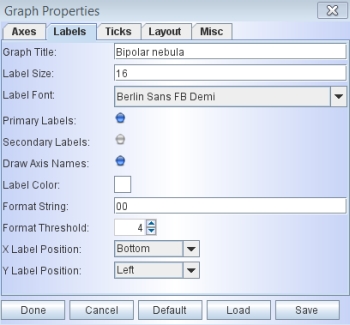
The graph settings allow you to change the labels, tickmarks and additional text on the image displays. This helps you to prepare your results for publication quality labels. There are many options to choose from, so experiment with them to find what suits your needs.
Occasionally you might want to save your rendered images and p-v diagrams with different names or in different directories. By clicking on the little blue marble icon at the top right of the image views you have access to several image saving commands.
You have two options to save your images. "Save Image" writes a file that includes the rendered image only, while the "Save Display Image" will include the labels, tickmarks, slit or any other information on the display. When saving your images, make sure to include a valid extension with the filename. Shape uses the extension to set the file format. Most common formats are supported.
The "Load Image" option will load an image into the render buffer and replace the current rendered image. This is useful, for example, to apply seeing to a high resolution image or any other of the image filters.